0%

GitLab and Jenkins and Unity

这篇文章讲了如何在Docker上安装GitLab,Jenkins,并且最终Jenkins从GitLab上拉取到项目文件。
我最终的目的是希望能够对Unity项目进行打包部署,所以我开始关联Jenkins和Unity。因为我的Unity是装在物理机上,而Jenkins是装在Docker上,所以Jenkins没办法调取Unity进行打包操作。
所以我后面采用的是GitLab部署在Docker上,而Jenkins和Unity都是安装在物理机上,这样Jenkins通过GitLab的Url拉取项目,然后通过Unity Puglin插件调用Unity进行打包,当然也可以使用windows的批处理命令build.bat的方式。采用Unity Plugin的方式的一个好处就是unity的log会直接显示到Jenkins的log界面上。

其中,虽然Jenkins和GitLab的安装位置不一样,但是他们之间的关联操作和之前的是一样的。这里我们讲一下Jenkins和Unity的关联步骤。
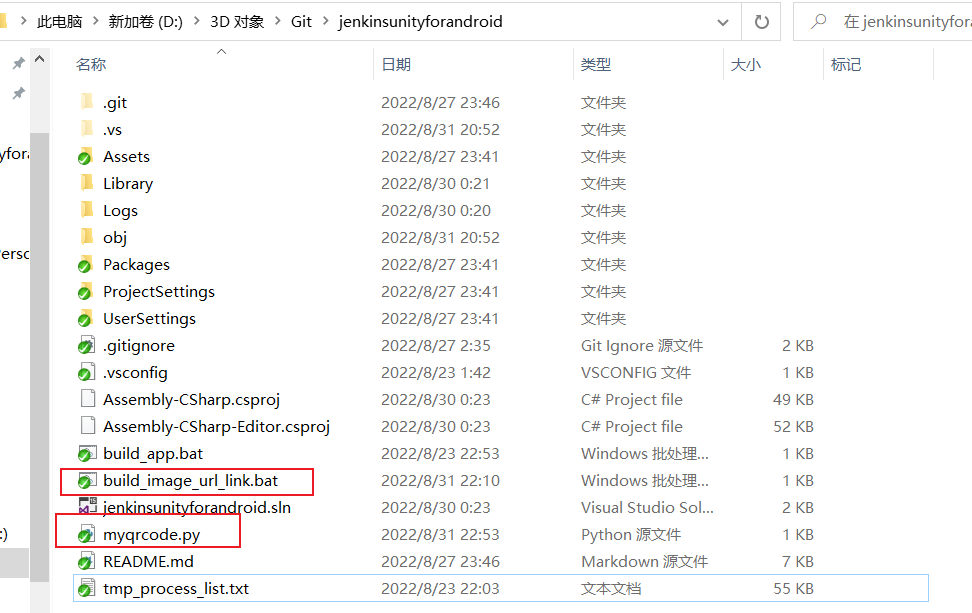
首先建一个Unity项目,然后在项目根目录下创建两个文件build_image_url_link.batmyqrcode.py
build_image_url_link.bat

1
2
3
4
set BASE_PATH=D:\ServicesData\Publish\%1\%2
set BASE_URL=http://192.168.31.186:8080/Publish/%1/%2
python myqrcode.py %BASE_URL%/%3_%4.apk %BASE_PATH%\qrcode.png
echo DESC_INFO:%BASE_URL%/qrcode.png,%BASE_URL%/%3_%4.apk

myqrcode.py

1
2
3
4
5
6
import qrcode
import sys
data = sys.argv[1]
path=sys.argv[2]
img = qrcode.make(data)
img.save(path)

wwwwwww
然后在Editor下创建BuildTools.cs脚本。

1
2
3
4
5
6
7
8
9
10
11
12
13
14
15
16
17
18
19
20
21
22
23
24
25
26
27
28
29
30
31
32
33
34
35
36
37
38
39
40
41
42
43
44
45
46
47
48
49
50
51
52
53
54
55
56
57
58
59
60
61
62
63
64
65
66
67
68
69
70
71
72
73
74
75
76
77
78
79
80
81
82
83
84
85
86
87
88
89
90
91
using System.Collections;
using System.Collections.Generic;
using UnityEngine;
using UnityEditor;
using System;

public class BuildTools
{
public static class BuildTargetName
{
public const string android = "Android";
public const string window = "Window";
}
public static class EnvironmentParam
{
public const string projectName = "--projectName";
public const string productName = "--productName";
public const string version = "--version";
public const string target = "--target";
}
public static bool GetEnvironmentParam(string paramName, out string paramValue)
{
paramValue = null;
string[] args = System.Environment.GetCommandLineArgs();
foreach (var s in args)
{
if (s.Contains(paramName))
{
if (s.Split(':').Length > 1)
{
paramValue = s.Split(':')[1];
return true;
}
}
}
return false;
}

[MenuItem("Build/Build APK")]
public static int BuildApk()
{
try
{
if (!GetEnvironmentParam(EnvironmentParam.productName, out string productName))
{
productName = "productName";
}
if (!GetEnvironmentParam(EnvironmentParam.version, out string bundleVersion))
{
bundleVersion = "bundleVersion";
}
if (!GetEnvironmentParam(EnvironmentParam.projectName, out string projectName))
{
projectName = "projectName";
}
if (!GetEnvironmentParam(EnvironmentParam.target, out string target))
{
target = BuildTargetName.android;
}
string extention = ".exe";
PlayerSettings.productName = productName;
PlayerSettings.bundleVersion = bundleVersion;
BuildPlayerOptions opt = new BuildPlayerOptions();
opt.scenes = new string[] { "Assets/Scenes/SampleScene.unity" };
switch (target)
{
case BuildTargetName.android:
opt.target = BuildTarget.Android;
extention = ".apk";
break;
case BuildTargetName.window:
opt.target = BuildTarget.StandaloneWindows64;
extention = ".exe";
break;
}

opt.locationPathName = $"D:/ServicesData/Publish/{projectName}/{target}/{productName}_{bundleVersion}{extention}";

opt.options = BuildOptions.None;
BuildPipeline.BuildPlayer(opt);
Debug.Log("Build Done!");
}
catch(Exception e)
{
Debug.LogError(e.Message);
return -1;
}
return 0;
}
}

wwwwwww
到这一步Unity项目就建好了,然后将它提交的GitLab上。

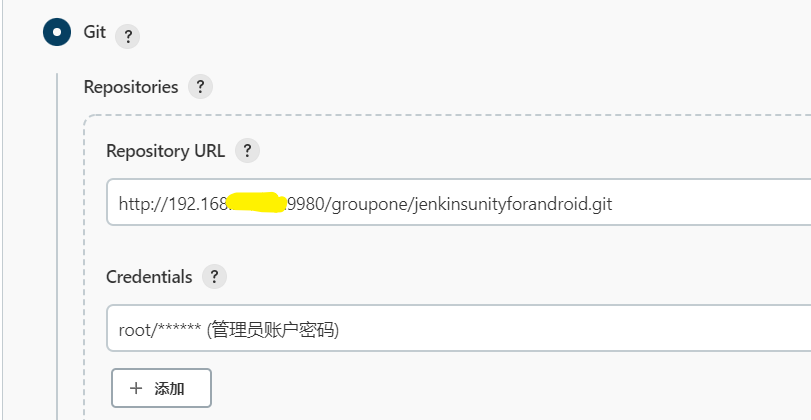
创建一个打包项目,关联到GitLab,操作步骤参考上面的链接。进入当前打包项目的配置界面。按下图配置。
wwwwwww
wwwwwww
wwwwwww
wwwwwww
wwwwwww
wwwwwww
wwwwwww
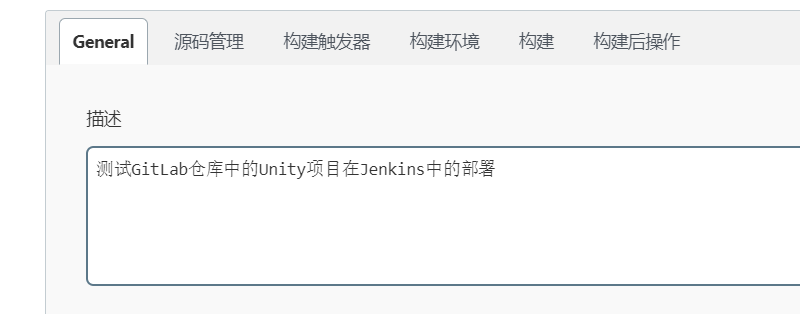
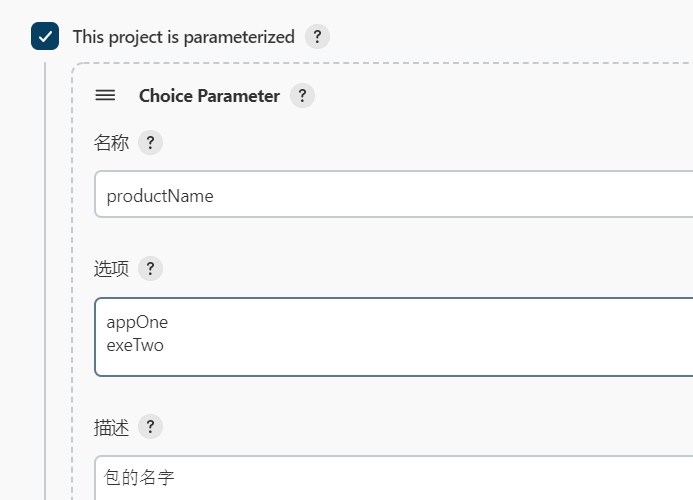
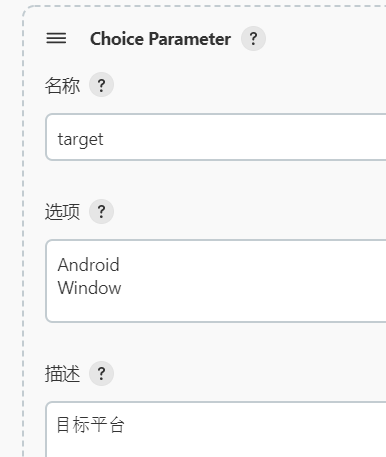
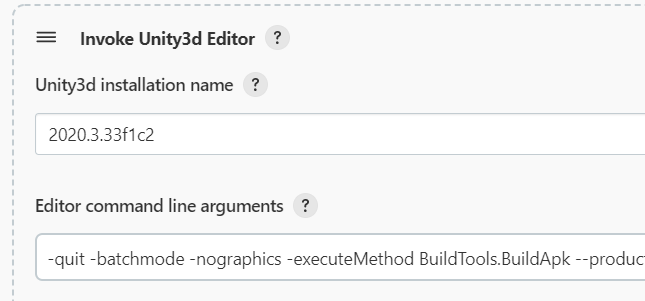
-quit -batchmode -nographics -executeMethod BuildTools.BuildApk --productName:$productName --version:$version --projectName:JenkinsUnityForAndroid --target:$target
wwwwwww
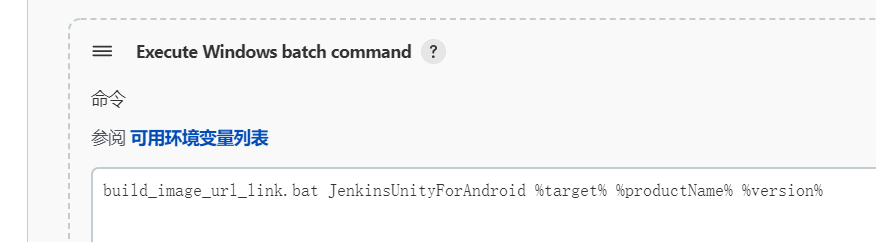
build_image_url_link.bat JenkinsUnityForAndroid %target% %productName% %version%
wwwwwww
DESC_INFO:(.*),(.*)
<img src="\1" height="200" width="200" /> <a href="\2">点击下载</a>

这样就基本配置好Jenkins和Unity项目了。但是上面配置中多了很多奇怪的操作,像什么Python脚本之类的。这是因为我想将打包好的包发布到一个本地服务,然后通过二维码下载。
所以这里我需要搭建一个本地服务,看网上有说用蒲公英什么的来当作发布平台,但是我就想本地局域网用,所以使用我比较熟悉的HFS来冲动服务。
wwwwwww
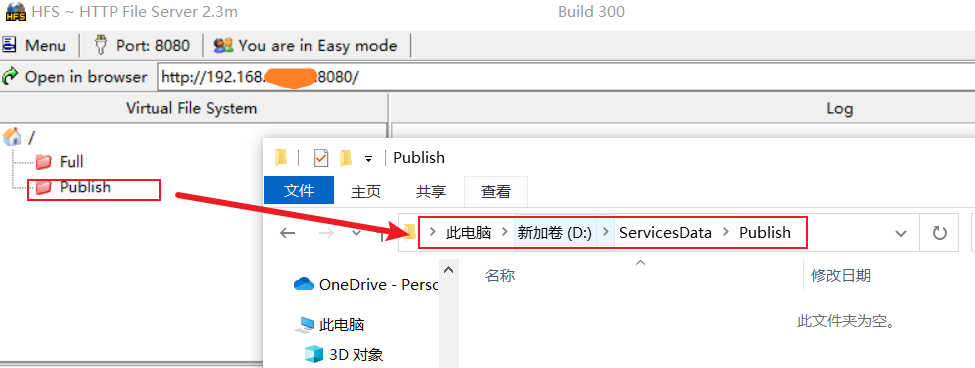
前面打包代码里面会将好的包放到这个服务路径下面,然后可以通过Url来访问,假设当前打好的包在这个路径下,那么手机输入对应的Url就可以下载了。不过每次都要输入Url很麻烦。所以这里考虑使用二维码。
这里讲了使用qrcodeImage两个python插件来生成二维码,所以首先我们要安装Python,这里Python 3.7.7下载,安装默认安装,并勾选写入环境变量。
然后打开命令行窗口,分别输入pip install qrcodepip install Image两个命令,安装好两个插件。
然后回到Jenkins,设置Jenkins内部的环境变量。
wwwwwww
wwwwwww
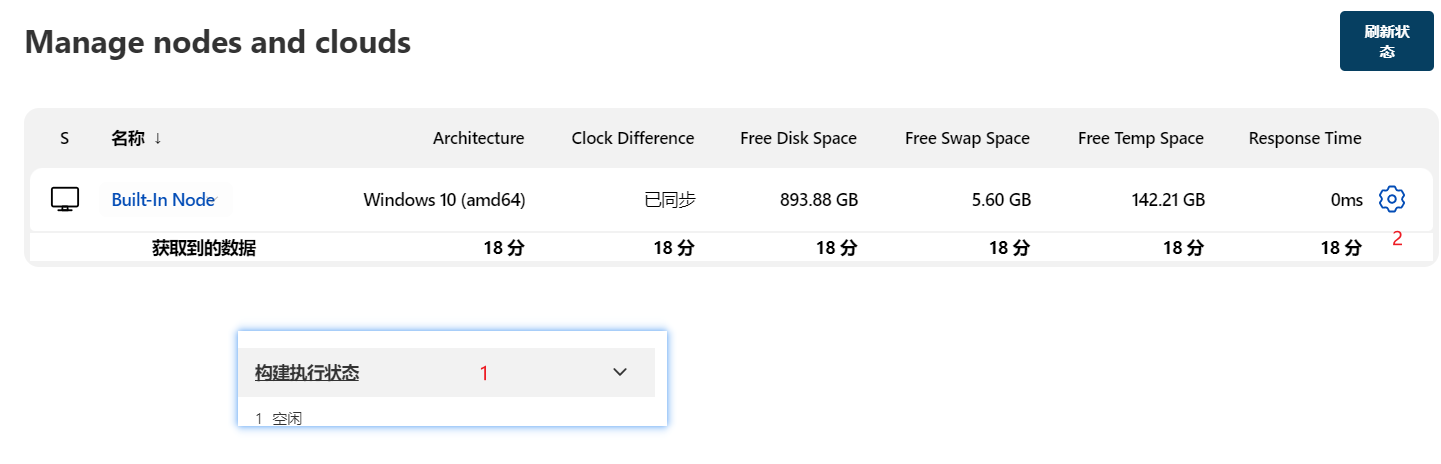
这里因为我的python是安装在C:\Users\10524\AppData\Local\Programs\Python\Python37目录下的。都准备好后,就可以开始构建了,下面是最终效果。
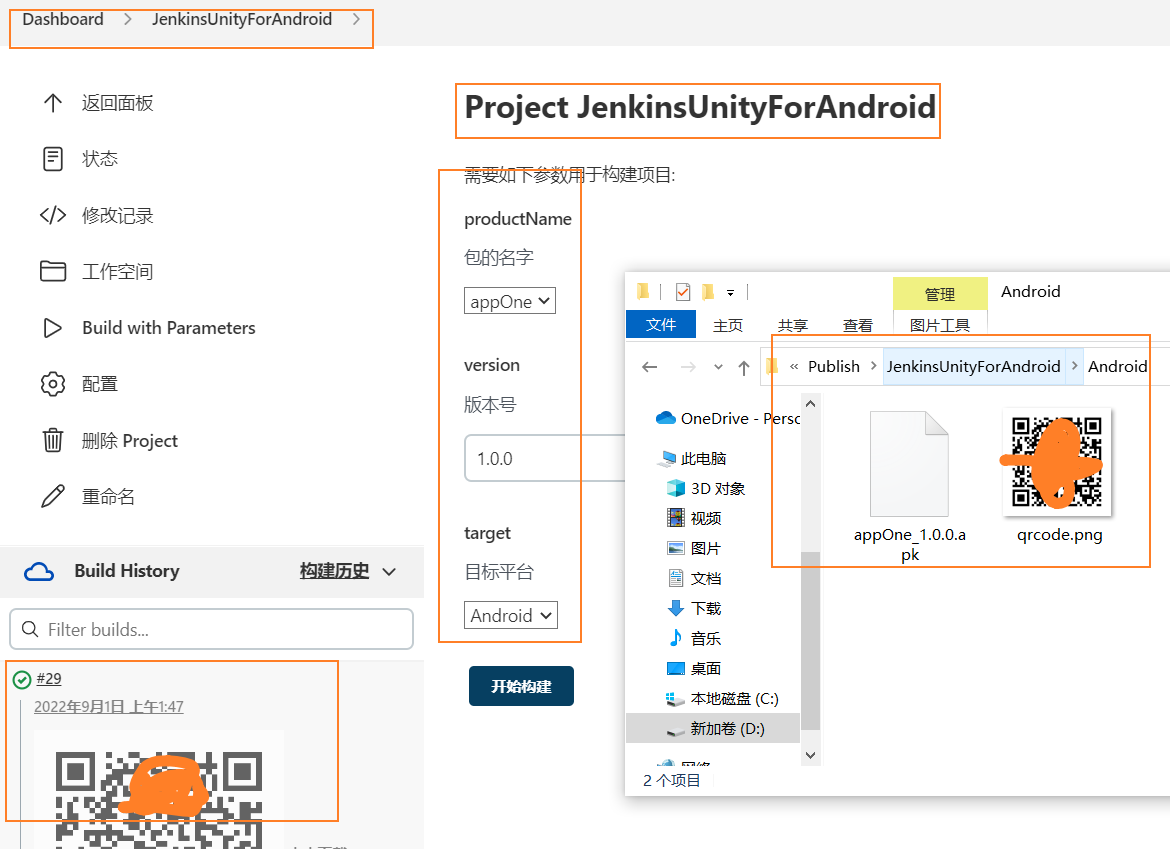
wwwwwww

参考

docker+gitlab+jenkins从零搭建自动化部署
Jenkins生成APK链接的二维码
Jenkins构建Python项目提示:‘python‘ 不是内部或外部命令,也不是可运行的程序
Python 3.7.7下载Windows x86-64 executable installer,安装默认安装,并勾选写入环境变量。
HFS下载,搭建简易服务。